Translating a One View Report
Objective:
Demonstrate how to translate a One View Report.
Duration:
35 minutes
One View Reporting empowers users to create and personalize reports from JD Edwards EnterpriseOne applications. These reports can be shared easily across an organization. For multi-national organizations, a personal report can be translated into other languages.
For a One View report to be translated, it is critical that the report leverage the Use Data Dictionary Item Name in the Report Definition.
Use Data Dictionary Item Name: This option will use the column titles from the data dictionary. This option should be used if the report created needs to be translated. By using the Data Dictionary titles, the fields in Layout Editor will be the same for all languages and allow the report to be shared across languages.
Synchronize a report to the data dictionary naming convention
Translate a One View Report
EnterpriseOne is installed and running.
BI Publisher Enterprise Edition 11g is installed and running.
Database has sample data available.
Sync Data Dictionary Naming Convention
1. Sign into EnterpriseOne.
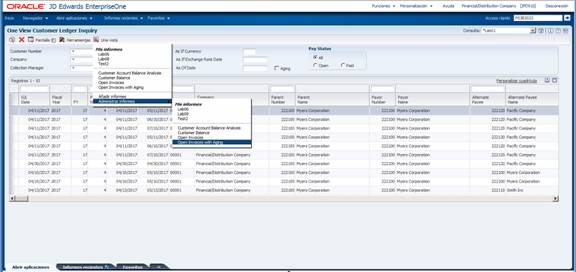
2. Use the Fastpath to access One View Customer Ledger Inquiry. Enter P03B2022 in Fastpath.
If a report has been created using Use Column Title and the report now needs to be translated, there is an option to change the data model to Use Data Dictionary Item Name.
3.
Click ![]() , Manage Reports, select Report Name, and click on the
Report Definition tab.
, Manage Reports, select Report Name, and click on the
Report Definition tab.
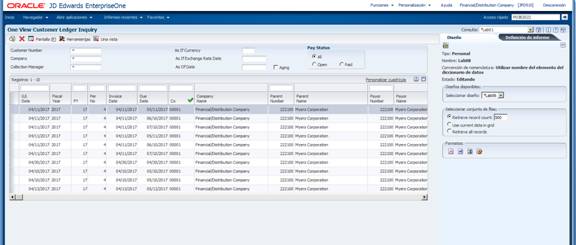
4.
On the Report
Definition tab, click ![]() , (Sync a report to
the data dictionary naming convention). Sync a report to the data dictionary
naming convention will copy the report definition and use the Use Data
Dictionary Item Name option.
, (Sync a report to
the data dictionary naming convention). Sync a report to the data dictionary
naming convention will copy the report definition and use the Use Data
Dictionary Item Name option.
5. Give the report a new name Report Name 2 and click Ok.
Translate Report
1.
Click ![]() , Manage Reports, select Report Name 2, and
, Manage Reports, select Report Name 2, and ![]() .
.
2. Within Layout Editor, select Properties.
3. Export the XLIFF file, click on the Extract Translation button.
4. Select Save to File and click OK.
5. Navigate to the XLIFF file and double-click on transaltion.xlf.
6. Select the option to Select a program from a list of installed programs and click OK.
7. Select Notepad.
8. Notepad will open with the XLIFF file.
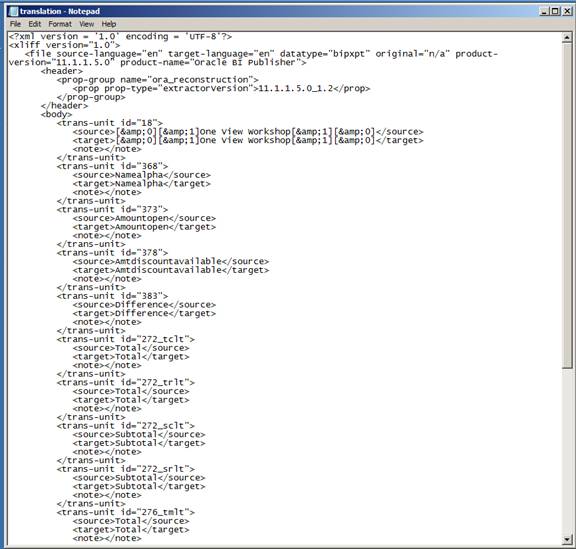
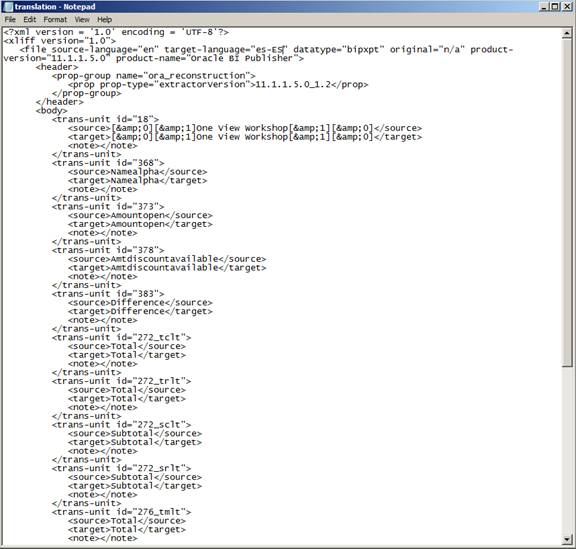
9. In this activity, we are translating to Spanish. In order to do so, we need to set the target-language= es. (See the BI Publisher documentation for the list of values.)
![]()
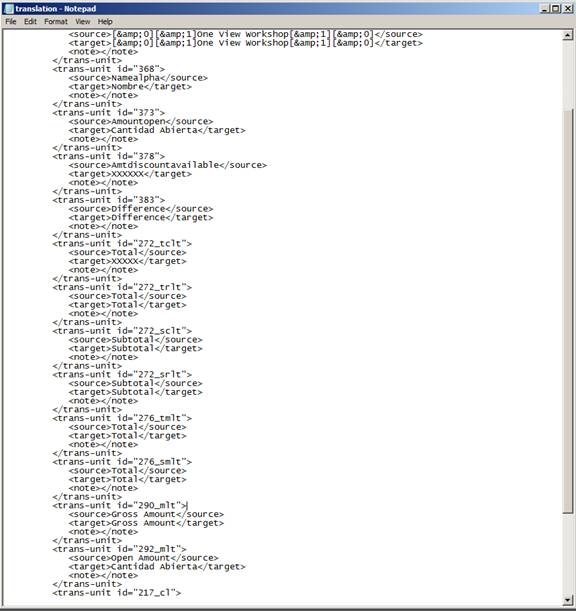
10. For each of the text strings you want to translate, change the value in the <target> tag</target> For example, <target>Namealpha</target> or <target>Gross Amount</target>.
11. Change:
a. target-language="en" to target-language="es"
b. <target>Namealpha</target> to <target>Nombre</target>
c. <target>Open Amount</target> to <target> Cantidad Abierta </target>
![]()
![]()
![]()
12. Save the file and close Notepad.
13. Go back to BI Publisher.
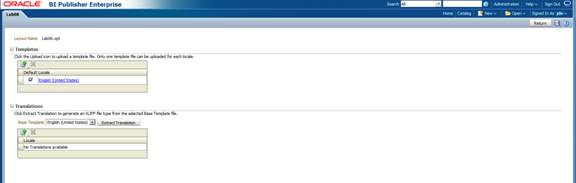
14.
To upload the
translations into BI Publisher, click the ![]() , button.
, button.
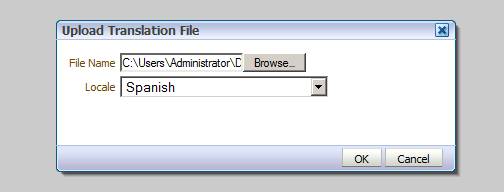
15. Select the file to upload by clicking the Browse button.
16. For Locale press the arrow and select Spanish.
17. Click OK.
![]()
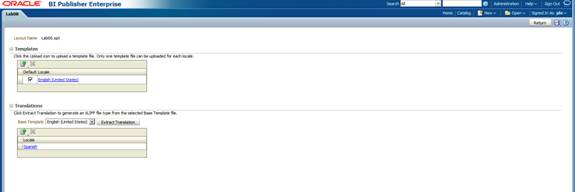
18. There will be translation listed under Locale for Spanish.
19. Exit BI Publisher.
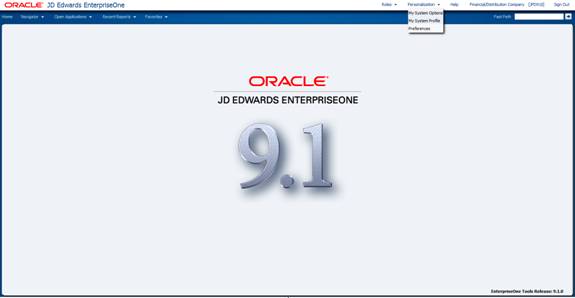
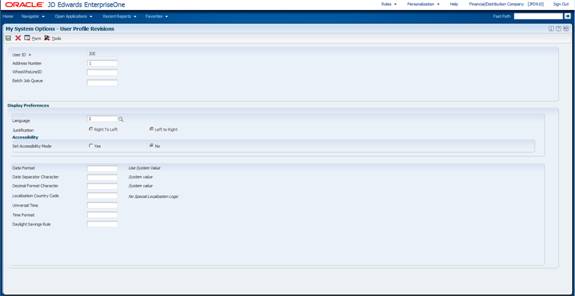
20. To see the report with the translations, the User Profile needs to be changed to Spanish. Select My System Options under Personalization.
![]()
21. Select User Profile Revisions.
22. Change the Language to S and Save.
![]()
23. Sign out of EnterpriseOne and sign back in.
24. Navigate back to P03B2022.
25.
Click ![]() , Manage Reports, select Report Name 2.
, Manage Reports, select Report Name 2.
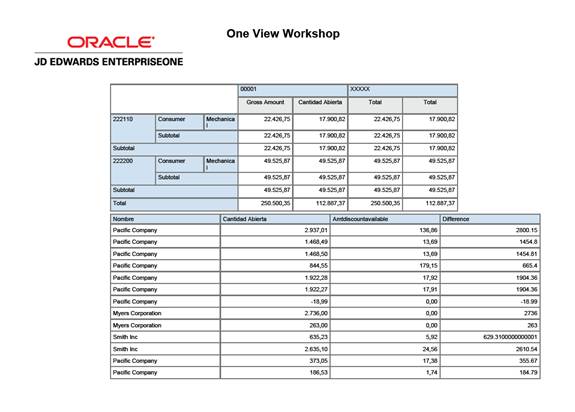
26. Click the PDF output button.
![]()
![]()
![]()
![]()